“Segment Anything Model” – SAM – is a Deep Learning model created and trained by a team of researchers at Meta.
The innovation was presented in a research paper published on April 5, 2023.
It immediately attracted massive public interest – the associated Twitter post has accumulated over 3.5 million views to date:
Computer Vision professionals are now turning their attention to SAM – but why?
What is SAM?
In the Segment anything research paper, SAM is presented as a “foundational model”.
A foundational model is a Machine Learning model trained on a massive amount of data (often by self-supervised or semi-supervised learning) and whose purpose is to be used and re-trained on a more specific task.
In other words, SAM is a pre-trained model designed to be adapted to other tasks (notably through fine-tuning).
For example, SAM can be re-trained and used to segment only the people in a dataset.
Person segmentation is an annex task that SAM can perform because it has been trained on a dataset containing this type of object – but not only!
How was SAM trained?
SAM was trained on the SA-1B dataset, a dataset introduced by Meta in parallel with the Segment Anything research paper.
The dataset of Facebook’s parent company contains over 11 million images collected nearly over the entire planet – an important aspect for developing a model capable of generalization.
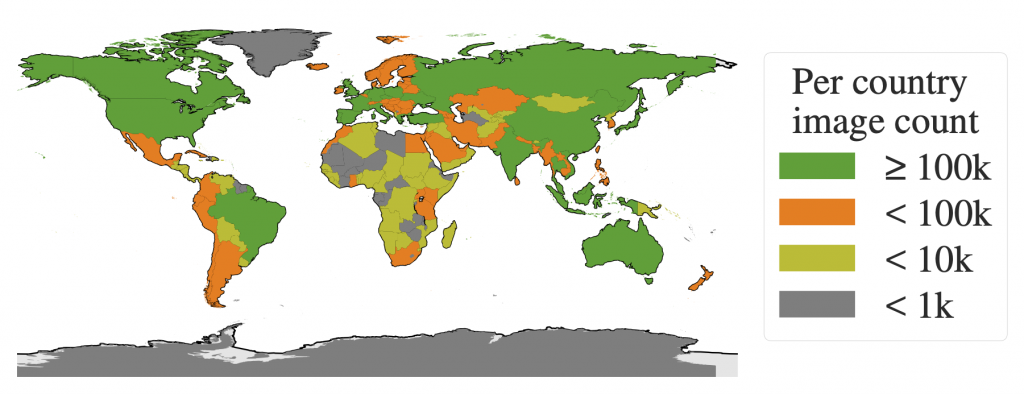
These high quality images (on average 1500×2250 pixels) are accompanied by 1.1 billion segmentation masks corresponding to the dataset’s label.
Meta’s aim with this dataset is to create a segmentation reference for Artificial Intelligence PhDs. It is officially licensed free for research purposes.
Despite this massive amount of information, it’s important to note that masks are not associated with classes. In other words, even if SAM can generate a mask of a person, it will be unable to indicate that this mask represents a person.
This is an important point to bear in mind, as it means that SAM must be combined with other algorithms in order to be truly useful.
Let’s take a closer look.
How do I use Segment Anything – SAM?
To get started, we need to load 2 items:
- the segment-anything GitHub folder, which contains the classes and functions for using SAM
- the pre-trained model weights for using the version of the model obtained by Meta’s researchers
!pip install git+https://github.com/facebookresearch/segment-anything.git &> /dev/null
!wget -q https://dl.fbaipublicfiles.com/segment_anything/sam_vit_h_4b8939.pth
Next, we create 3 global variables:
MODEL_TYPE: the SAM architecture to be usedCHECKPOINT_PATH: the path to the file containing the model weightsDEVICE: the processor used,"cpu"or"cuda"(if a GPU is available)
MODEL_TYPE = "vit_h"
CHECKPOINT_PATH = "/content/sam_vit_h_4b8939.pth"
DEVICE = "cuda" #cpu,cuda
We can now load the SAM model using the sam_model_registry function, indicating the model weights:
from segment_anything import sam_model_registry

sam = sam_model_registry[MODEL_TYPE](checkpoint=CHECKPOINT_PATH).to(device=DEVICE)
Once the model has been loaded, Meta gives us two options for using it:
- the Generator option, which allows you to obtain all the masks generated by the model from an image
- the Predictor option, which allows us to obtain one or more specific masks from an image according to a prompt.
We’ll explore these two options in the following lines.
Before that, let’s load an image from the Internet on which we’ll experiment with our model:
from urllib.request import urlopen
import cv2
import numpy as np
from google.colab.patches import cv2_imshow

resp = urlopen('https://images.unsplash.com/photo-1615948812700-8828458d368a?ixlib=rb-4.0.3&ixid=M3wxMjA3fDB8MHxwaG90by1wYWdlfHx8fGVufDB8fHx8fA%3D%3D&auto=format&fit=crop&w=2072&q=80')
image = np.asarray(bytearray(resp.read()), dtype='uint8')
image = cv2.imdecode(image, cv2.IMREAD_COLOR)
image = cv2.resize(image, (int(image.shape[1]/2.5), int(image.shape[0]/2.5)))

cv2_imshow(image)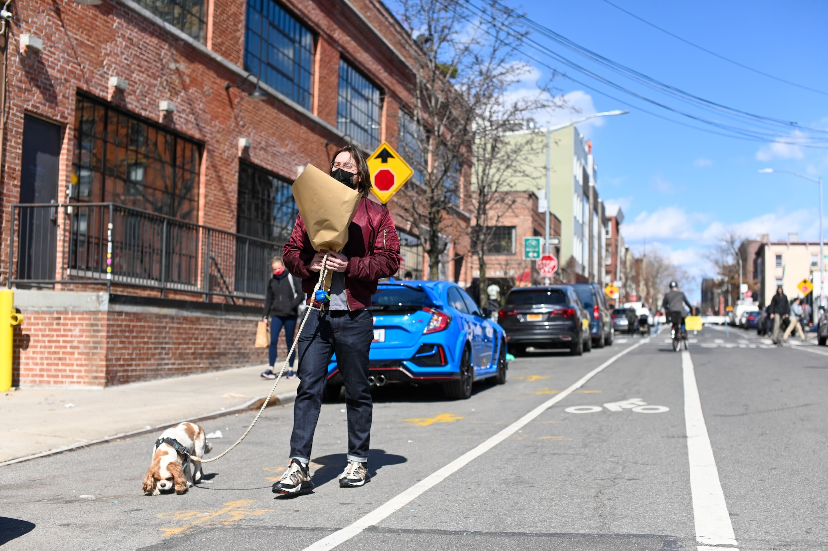
Our image contains several people, a dog and some cars.
Now we’ll use SAM with the Generator option to segment this image.
Generator
In this section, we’ll use the Generator version of SAM. This will enable us to obtain the set of masks generated as a result of the model’s analysis of our image.
Let’s initialize the SamAutomaticMaskGenerator object:
from segment_anything import SamAutomaticMaskGenerator

mask_generator = SamAutomaticMaskGenerator(sam)
Next, we launch mask generation using the generate() function:
masks_generated = mask_generator.generate(image)This function generates a mask for each object detected, as well as other data. SAM actually generates a set of information (in dictionary form) associated with the objects it detects.
Prediction result
We can display the keys obtained for each set of information:
print(masks_generated[0].keys())Output :
dict_keys([‘segmentation’, ‘area’, ‘bbox’, ‘predicted_iou’, ‘point_coords’, ‘stability_score’, ‘crop_box’])
The result is a set of 7 pieces of information. The first 'segmentation' represents the pixels corresponding to the location of the detected object: True if the pixel contains the object, False otherwise.
A mask can be displayed as follows:
cv2_imshow(masks_generated[3]['segmentation'].astype(int)*255)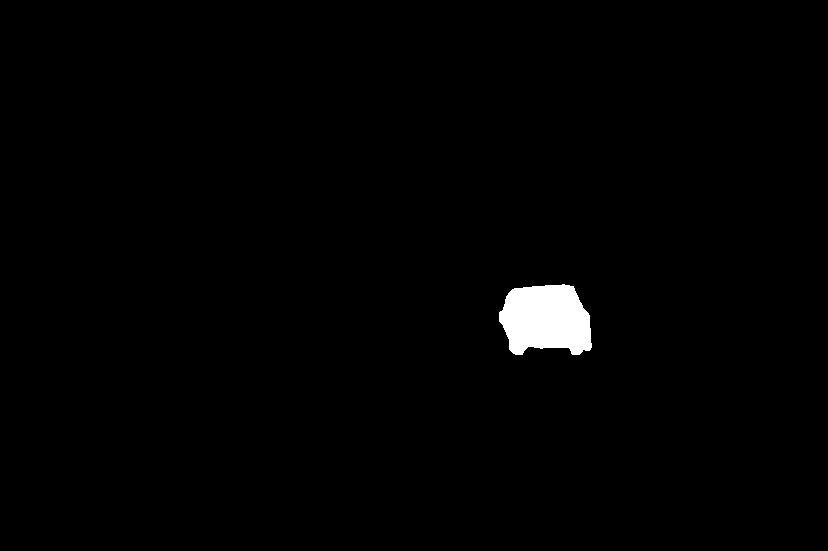
The other information in the set corresponds to the following descriptions:
area: mask area in pixelsbbox: mask bounding box in XYWH formatpredicted_iou: the mask quality score predicted by the modelpoint_coords: the sampled input point that generated this maskstability_score: an additional mask quality scorecrop_box: the image crop used to generate this mask in XYWH format
Most practitioners will not use this information, but for specific cases it is important to know that SAM not only generates masks, but also additional information such as this.
Here’s the rest of the information obtained for the mask displayed above:
print('area :', masks_generated[3]['area'])
print('bbox :',masks_generated[3]['bbox'])
print('predicted_iou :',masks_generated[3]['predicted_iou'])
print('point_coords :',masks_generated[3]['point_coords'])
print('stability_score :',masks_generated[3]['stability_score'])
print('crop_box :',masks_generated[3]['crop_box'])
Output :
area : 5200 bbox : [499, 284, 92, 70]
predicted_iou : 1.005275845527649
point_coords : [[582.1875, 318.546875]]
stability_score : 0.981315553188324
crop_box : [0, 0, 828, 551]
We can also display the number of masks generated by SAM:
print(len(masks_generated))Output: 111
SAM has generated a total of 111 masks from our image.
Display prediction
Using the draw_masks_fromDict function detailed in this article, we can plot all the masks generated on our image:
segmented_image = draw_masks_fromDict(image, masks_generated)

cv2_imshow(segmented_image)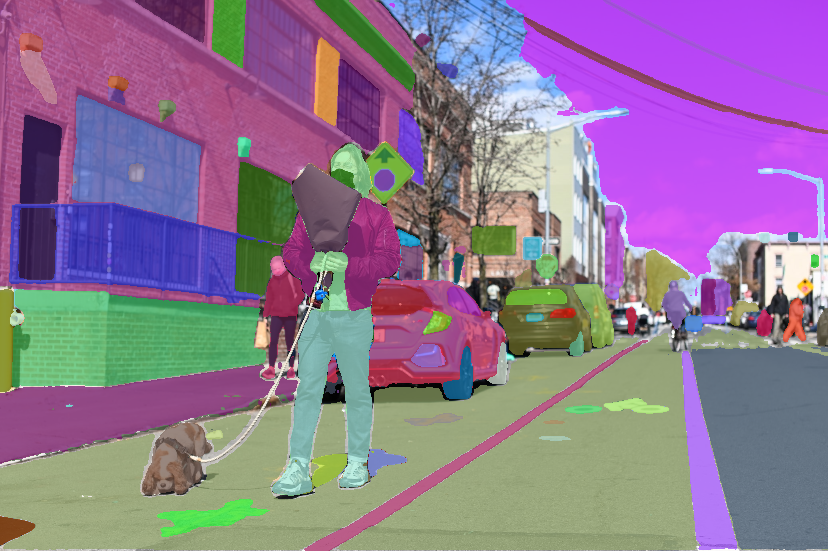
The starting image now contains the masks generated by SAM.
In this section, we used the Generator version of SAM. This enabled us to generate 111 masks from an image. In addition to masks, SAM also generates additional detection information. To visualize the model’s prediction, we finally plotted all the masks on our starting image.
By the way, if your goal is to master Deep Learning - I've prepared the Action plan to Master Neural networks. for you.
7 days of free advice from an Artificial Intelligence engineer to learn how to master neural networks from scratch:
- Plan your training
- Structure your projects
- Develop your Artificial Intelligence algorithms
I have based this program on scientific facts, on approaches proven by researchers, but also on my own techniques, which I have devised as I have gained experience in the field of Deep Learning.
To access it, click here :
Now we can get back to what I was talking about earlier.
SAM has thus enabled us to perform image segmentation. Nevertheless, we can see that the masks generated are out-of-order: there are no classes to distinguish the different masks. For example, people’s masks are not associated with a single color. The resulting segmentations can therefore not be ordered. The only information obtained here is the location and delimitation of objects.
What’s more, the masks generated can overlap. Indeed, SAM can detect objects inside other objects. On the positive side, this demonstrates SAM’s ability to detect virtually all objects in an image. This means that we can segment a dog, a car, a person, as well as other objects such as a wheel, a window or a pair of pants. The Generator version of SAM is therefore able to segment all objects in an image, and even overlapping objects.
Beyond the Generator
However, this feature also has a negative aspect: it increases the number of predictions in a given zone, which can disrupt the achievement of an objective. For example, if you want to detect people in an image, it’s not relevant to also detect the masks corresponding to their jackets and pants.
Furthermore, since SAM is not trained on labeled data, it is impossible to filter its predictions to keep the one we are interested in. This means that even if we were to segment all the images in a dataset with the Generator version of SAM, it would be impossible to easily extract, for example, people’s masks. Thus, the SAM Generator’s ability to segment all the objects in an image may not be suitable for solving certain problems.
Consequently, for targeted object detection, it is not appropriate to use the Generator version of SAM. Instead, we need to use the Predictor version. This version will enable us to use SAM with prompts to specify our request and target objects for detection.
Predictor
In this section, we’ll use the Predictor version of SAM. The Predictor version will enable us to detect targeted objects. To do this, we’ll send SAM prompts to specify the objects we wish to detect.
Currently, prompts can be sent to SAM in two ways:
- by points of interest
- by bounding boxes
SAM can take as input a point of interest (x and y coordinates) targeting an image pixel representing an object. The object designated by the point of interest will then enable SAM to generate the mask associated with this object.
SAM can also take as input a bounding box delimiting the contours of an object in an image. Based on these contours, SAM will generate an appropriate mask.
Note: “prompting” is a trendy term used, for the most part, to refer to text requests sent to ChatGPT. However, as demonstrated here with SAM, prompting is not limited to textual requests. It extends to a set of queries that the practitioner can send to a Machine Learning model.
It’s important to note that, although the functionality is not currently publicly available, Meta has made provision for textual request comprehension through its Segment Anything Model.
That said, for the rest of this tutorial, we need to have a prompt to send to SAM. Bounding boxes are a Computer Vision standard, so we’ll be using them.
Prompting with bounding boxes
If you wish to continue with this tutorial, you must first have bounding boxes associated with the objects you wish to segment.
If you don’t have bounding boxes for your image, you can easily produce them in just a few lines of code using the YOLO template.
You can learn how to use this template to quickly produce your own bounding boxes. A tutorial dedicated to the latest version of YOLO awaits you here.
Once YOLO has been used on our image, we get this result:
image_bboxes = image.copy()

boxes = np.array(results[0].to('cpu').boxes.data)

plot_bboxes(image_bboxes, boxes, score=False)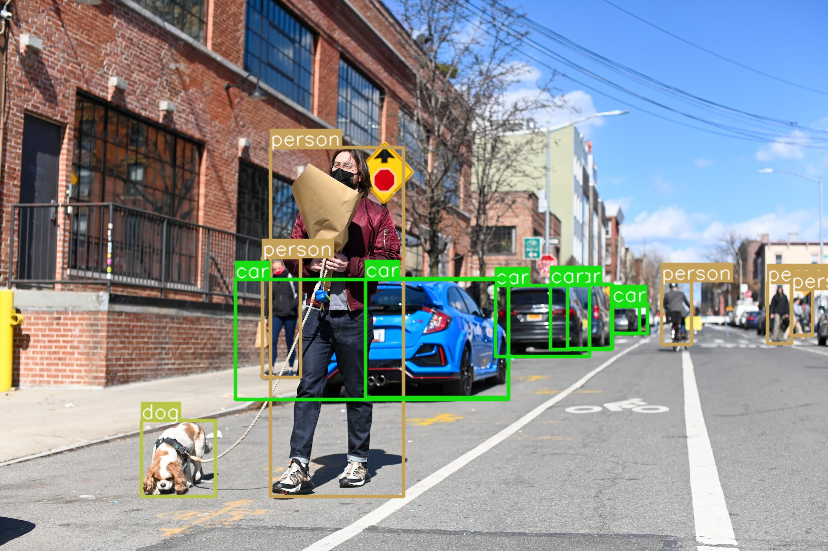
Note: the results variable is the result of the model prediction.
The bounding boxes obtained with YOLO are in this form:
print(boxes)Output:
[[ 495.96 285.65 589.8 356.48 0.89921 2]
[ 270.63 147.99 403.17 496.82 0.79781 0]
…
[ 235.32 279.23 508.93 399.63 0.3193 2]
[ 612.13 303.94 647.61 333.11 0.2854 2]]
The first 4 values represent the bounding box coordinates, the 5th value represents the confidence score for the predicted bounding box and the 6th value is the detected class.
Now that we have our prompt, let’s initialize the SamPredictor object:
from segment_anything import SamPredictor

mask_predictor = SamPredictor(sam)
Next, we specify the image to be analyzed by SAM:
mask_predictor.set_image(image)From here on, the tutorial is divided into two parts:
- single object detection
- batch detection: a batch of objects
Let’s start with the first option.
Single object detection
To predict the mask of an object, we tell our Predictor the bounding box corresponding to this object in the predict() function:
mask, _, _ = mask_predictor.predict(
    box=boxes[1][:-2]
)
We obtain a mask in the form of a Boolean array indicating the location of the detected object (as previously in the 'segmentation' key of the dictionary): True if the pixel contains the object, False otherwise.
We can draw this mask on our image using the draw_mask function described in this article:
mask = np.transpose(mask, (1, 2, 0))

segmented_image = draw_mask(image, mask)

cv2_imshow(segmented_image)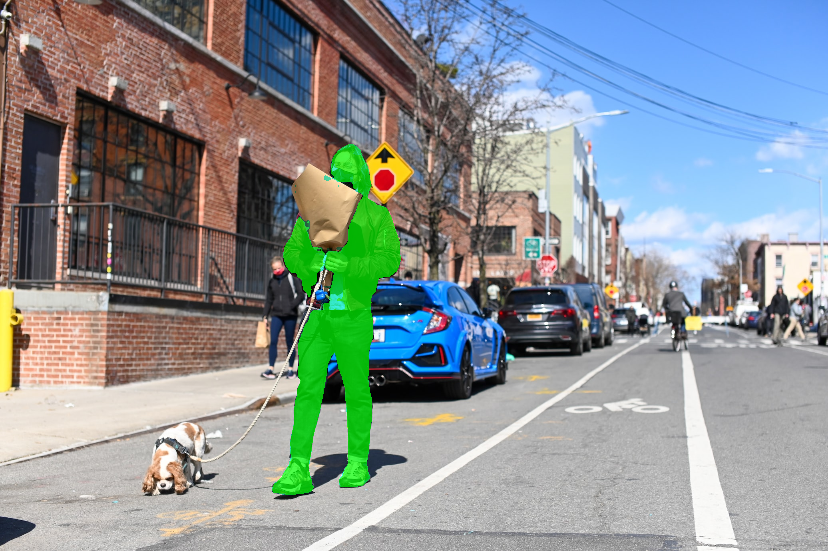
Our image now contains the mask detected by SAM.
Thanks to the prompt given to SAM, we’ve been able to obtain a mask of the object and display it on our image.
Now let’s see how to detect the masks corresponding to all our bounding boxes.
Detecting multiple objects
To make predictions on a set of bounding boxes, we need to gather them into a PyTorch tensor.
We then use transform.apply_boxes_torch() to update our object.
Finally, we use predict_torch to predict the corresponding masks.
import torch

input_boxes = torch.tensor(boxes[:, :-2], device=mask_predictor.device)

transformed_boxes = mask_predictor.transform.apply_boxes_torch(input_boxes, image.shape[:2])
masks, _, _ = mask_predictor.predict_torch(
    point_coords=None,
    point_labels=None,
    boxes=transformed_boxes,
    multimask_output=False,
)
The result is a batch of 13 masks encoded on one dimension (1, 551, 828).
To better manipulate this tensor, let’s remove the first irrelevant dimension:
print(masks.shape)
masks = torch.squeeze(masks, 1)
print(masks.shape)
Output :
torch.Size([13, 1, 551, 828])
torch.Size([13, 551, 828])
The advantage of having bounding boxes upstream of SAM is that we can associate each generated mask with the label corresponding to the bounding box, and thus a color to differentiate them when displayed.
Let’s define a gradient of colors associated with the classes that YOLO can predict:
COLORS = [(89, 161, 197),(67, 161, 255),(19, 222, 24),(186, 55, 2),(167, 146, 11),(190, 76, 98),(130, 172, 179),(115, 209, 128),(204, 79, 135),(136, 126, 185),(209, 213, 45),(44, 52, 10),(101, 158, 121),(179, 124, 12),(25, 33, 189),(45, 115, 11),(73, 197, 184),(62, 225, 221),(32, 46, 52),(20, 165, 16),(54, 15, 57),(12, 150, 9),(10, 46, 99),(94, 89, 46),(48, 37, 106),(42, 10, 96),(7, 164, 128),(98, 213, 120),(40, 5, 219),(54, 25, 150),(251, 74, 172),(0, 236, 196),(21, 104, 190),(226, 74, 232),(120, 67, 25),(191, 106, 197),(8, 15, 134),(21, 2, 1),(142, 63, 109),(133, 148, 146),(187, 77, 253),(155, 22, 122),(218, 130, 77),(164, 102, 79),(43, 152, 125),(185, 124, 151),(95, 159, 238),(128, 89, 85),(228, 6, 60),(6, 41, 210),(11, 1, 133),(30, 96, 58),(230, 136, 109),(126, 45, 174),(164, 63, 165),(32, 111, 29),(232, 40, 70),(55, 31, 198),(148, 211, 129),(10, 186, 211),(181, 201, 94),(55, 35, 92),(129, 140, 233),(70, 250, 116),(61, 209, 152),(216, 21, 138),(100, 0, 176),(3, 42, 70),(151, 13, 44),(216, 102, 88),(125, 216, 93),(171, 236, 47),(253, 127, 103),(205, 137, 244),(193, 137, 224),(36, 152, 214),(17, 50, 238),(154, 165, 67),(114, 129, 60),(119, 24, 48),(73, 8, 110)]Finally, we can use the draw_masks_fromList function developed in this article to draw all our masks, associating one color per label:
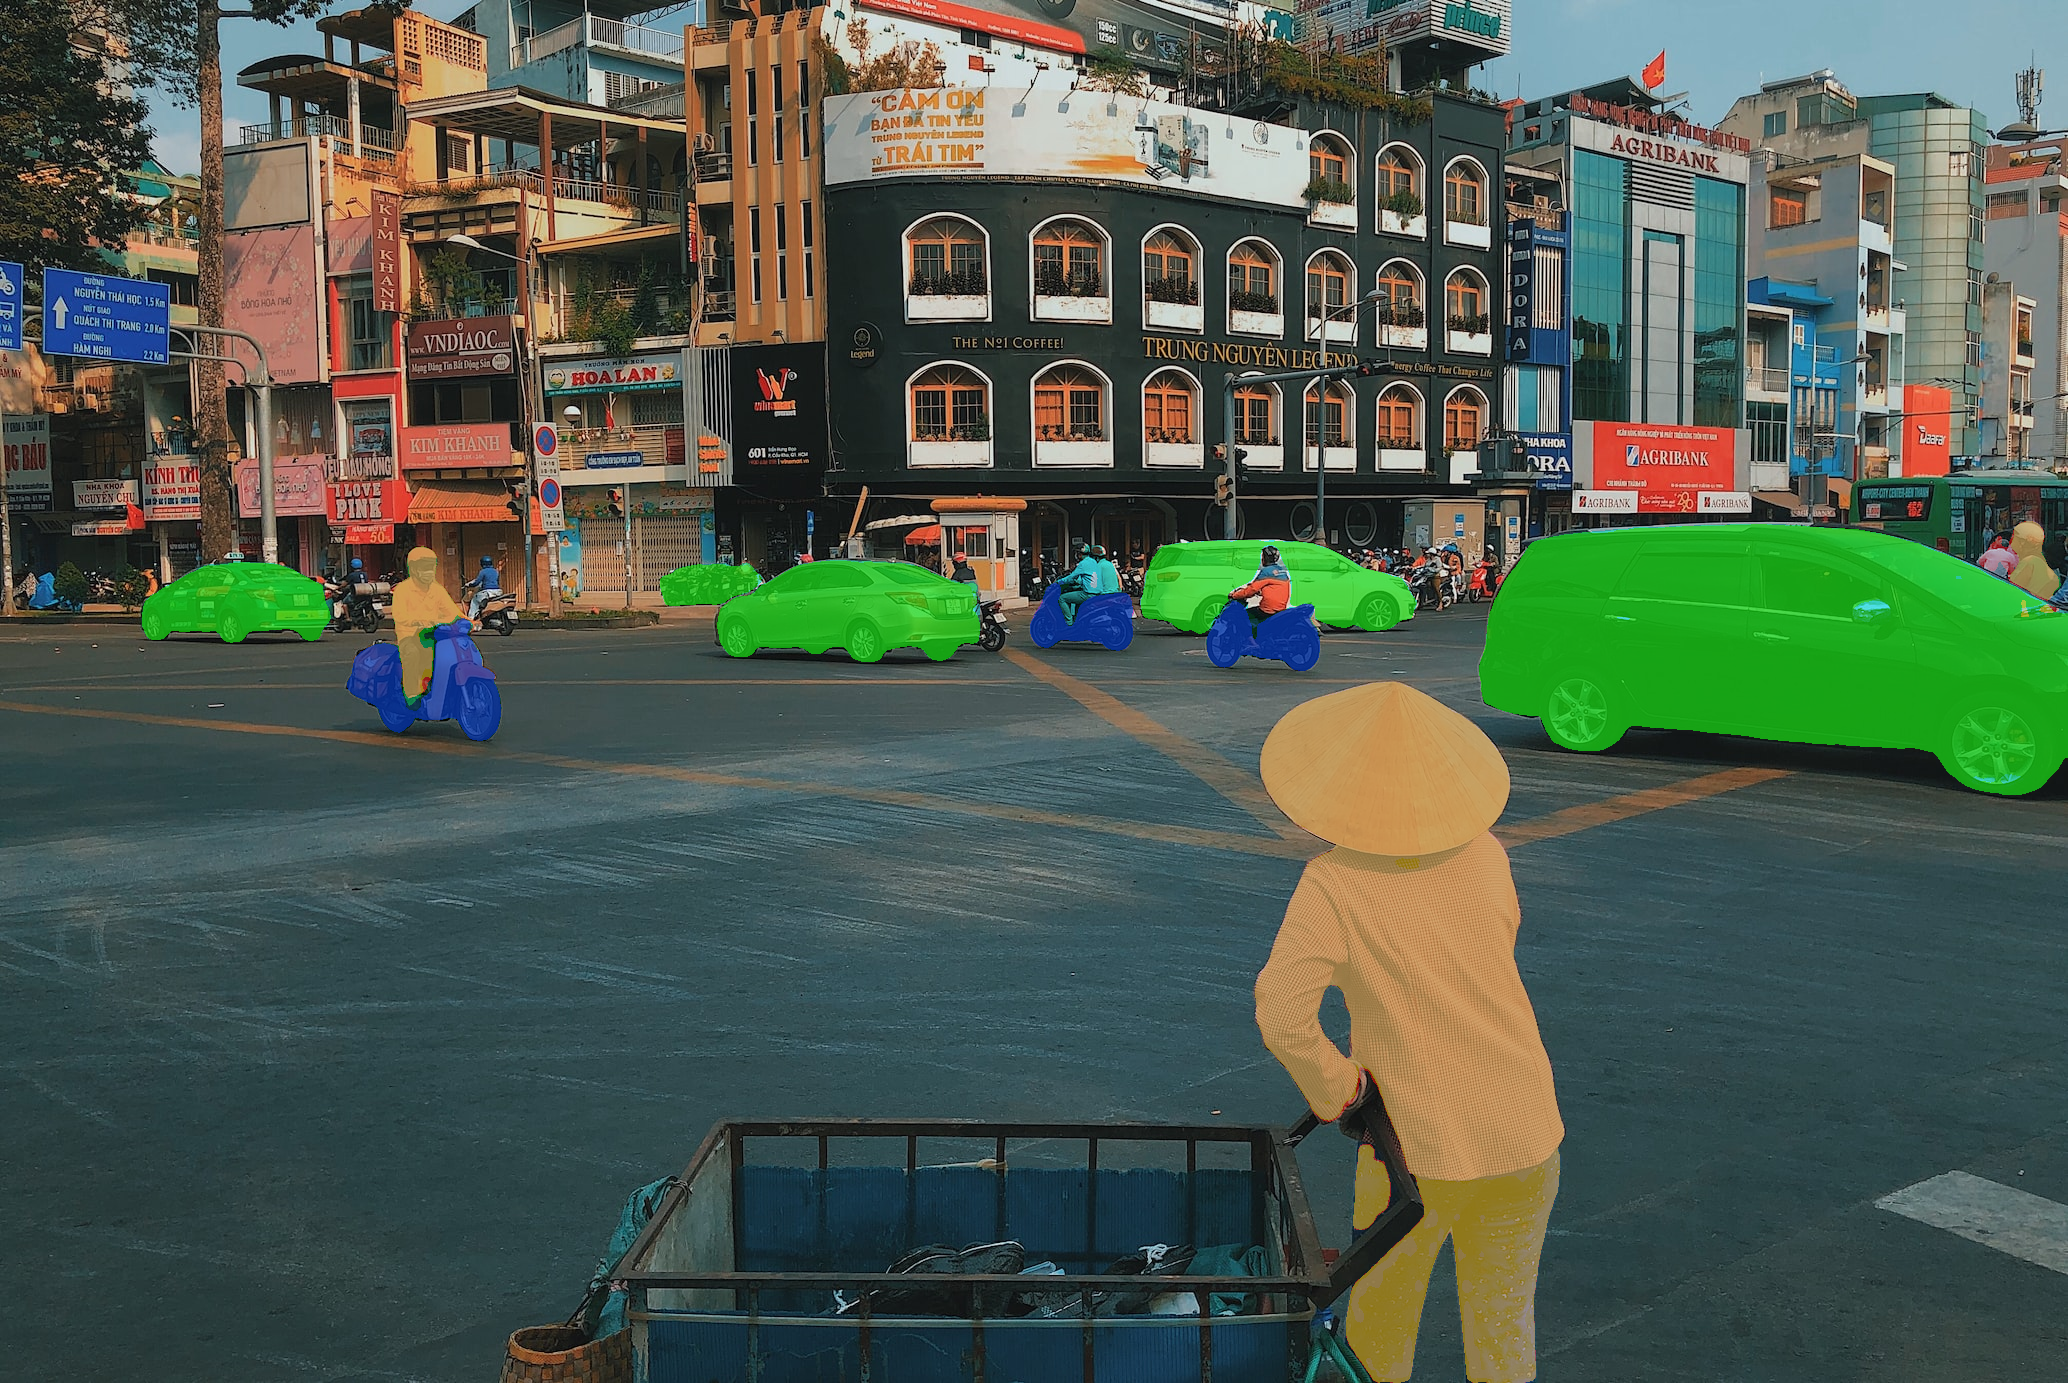
segmented_image = draw_masks_fromList(image, masks.to('cpu'), boxes, COLORS)

cv2_imshow(segmented_image)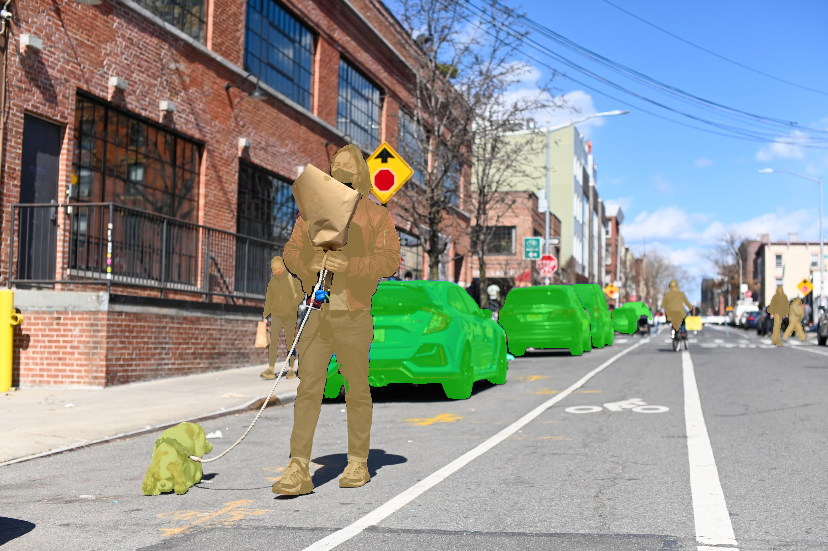
We’ve displayed all the masks predicted by YOLO using the bounding boxes we provided. In addition, each mask is colorized according to the class indicated by our bounding boxes. This makes it easy to distinguish between the various segmented objects.
Segmenting a video
This last method of mask prediction seems to be the preferred one for image segmentation.
But SAM can be used to do more than that!
In this article, we have discussed Segment Anything SAM at length. First we saw that SAM is a foundation model, trained on the SA-1b dataset. Next, we explored the different objectives that SAM can accomplish. Finally we learned, in practice, how to use the Segment Anything Model.
However, one use case has not been discussed here.
We’ve seen how to use SAM to segment an image, but it’s also possible to use SAM to segment videos.
I’ve recently created a free training course to help you master YOLO (the model that predicts location of objects using bounding boxes) on pre-recorded videos and live video streams.
Starting today, this free training also includes a tutorial on how to use SAM on videos.
To access your free training, click here :
One last word, if you want to go further and learn about Deep Learning - I've prepared for you the Action plan to Master Neural networks. for you.
7 days of free advice from an Artificial Intelligence engineer to learn how to master neural networks from scratch:
- Plan your training
- Structure your projects
- Develop your Artificial Intelligence algorithms
I have based this program on scientific facts, on approaches proven by researchers, but also on my own techniques, which I have devised as I have gained experience in the field of Deep Learning.
To access it, click here :