In this article, we’ll look at what quantization is and how you can use it with TensorFlow to improve and accelerate your models.
Since the release of ChatGPT, researchers have been striving to shrink the ever-growing storage space used by neural networks.
Numerous optimization techniques have been discussed and experimented to reduce the size of LLMs while preserving their performance.
A major technique has emerged and caught the eye of the Artificial Intelligence world: quantization.
Here, I invite you to discover what quantization is and learn how to use it in TensorFlow.
What is Quantization
The principle of Quantization
Quantization in Deep Learning is the process of reducing the size of a model in order to optimize its prediction speed.
In other words, it allows us to obtain a faster model by reducing the space needed to store it.
The weights of a Deep Learning model are generally coded on 32 bits. To reduce them, and optimize their storage, it is possible to convert them to 16 bits, 8 bits or even less.
For example, the value 0.123456789 can be represented on 32 bits, but it’s not possible to represent it on 16 bits. This is because there isn’t enough space to represent it on 16 bits.
To represent this value on 16 bits, its size must be reduced. The 16-bit version of 0.123456789 is 0.1235.
This value represents 0.123456789 less precisely, but its storage takes up less space. The value is then said to be “quantized”.
Pros & cons of Quantization
Applied to the weights of a neural network, quantization reduces its size.
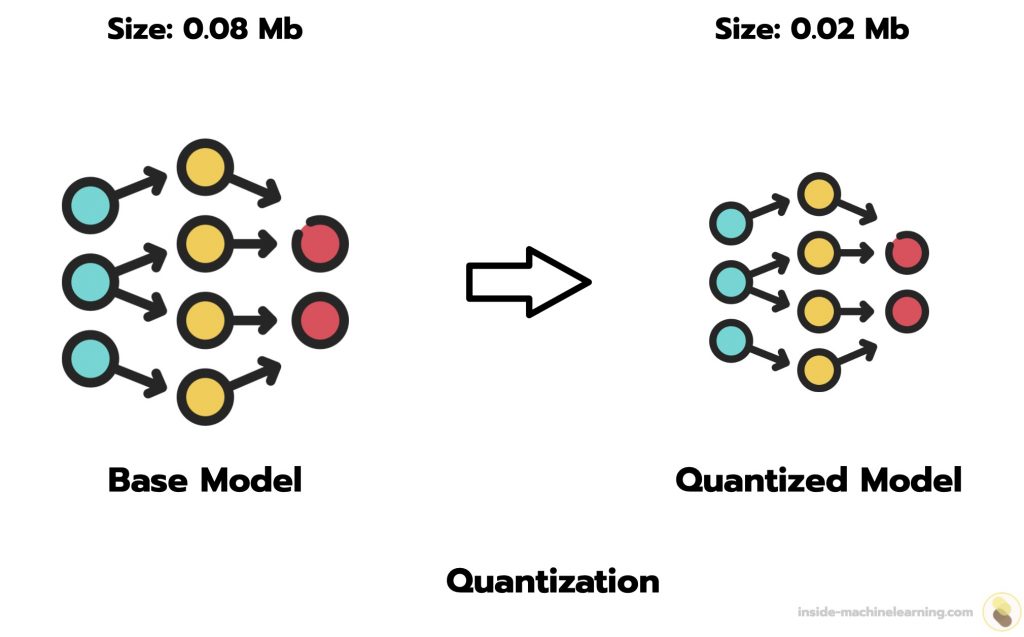
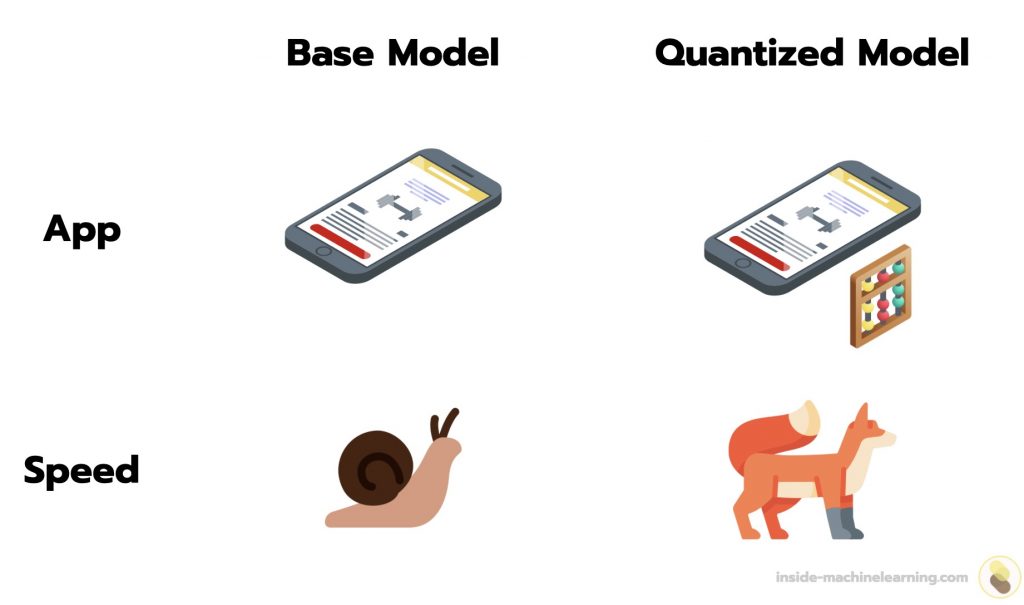
Thanks to this reduced size, the model is faster. Indeed, operations to make predictions require less time in 16-bit than in 32-bit.
With the TensorFlow API default values, the model size is divided by four. What’s more, we generally see an improvement in processor latency, from 1.5 to 4 times faster.
However, this reduction also comes at a cost: the accuracy of predictions is impacted.
So, while a quantized model will be faster, it will often be less accurate.
Note: even if the model will be less accurate after quantization, the impact is usually negligible.
| Model | Non-quantized Top-1 Accuracy | 8-Bit Quantized Accuracy |
|---|---|---|
| Nasnet-Mobile | 74% | 73% |
| Resnet-v2 50 | 75.6% | 75% |
When deploying the model, it will then be necessary to determine the main factor of the model to be emphasized: precision or speed.
If the project manager favors speed, he can accelerate the use of his Deep Learning model through quantization.
The two types of quantization
Post-Training Quantization
Post-Training Quantization (PTQ) consists in quantifying the weights of a model that has already been trained.
Indeed, it’s possible to reduce the size of a model after it has adapted its weights to an objective.
For example, let’s say you have an application using a Deep Learning model. If you want to increase its speed, you can extract the model’s weights and quantify them.
An already-trained model can be easily quantified. However, this approach is not optimal.
Another way is to transform a model before training, to make it more sensitive to quantization.
Quantization Aware Training
Quantization Aware Training (QAT) makes it possible to integrate quantization into the model learning process.
During training, QAT mimics the quantization process that will occur during inference.
This means that the model is trained while simulating the conditions it will encounter once quantified.
The aim of QAT is to prepare a model in such a way that the tools used later for quantization can easily and efficiently convert this model into a quantized version.
Thus, models using QAT are generally more accurate than those using PTQ. QAT is therefore the preferred approach.
Indeed, with PTQ, the model is not specifically optimized to work with reduced accuracy. Quantization after training can therefore lead to a greater loss of performance than with QAT.
QAT prepares Deep Learning models for quantization. If you want to quantize a model and have both options open to you, then I recommend using QAT.
When is a Deep Learning model quantized?
During QAT, the model is not quantized. More precisely, it solely takes into account future quantization.
With TensorFlow, quantization takes place when the model is converted to TensorFlow Lite format.
Note: TensorFlow Lite is TensorFlow’s framework for deploying Machine Learning models on mobile and high-end devices.
During training, the model is therefore not quantized.
To perform quantization, you’ll need to convert the model from TensorFlow format to TensorFlow Lite format.
I’ll show you how in the next section!
How to use Quantization
Converting a Basic Model into a Quantized Model – PTQ
In this article, we’ll concentrate on QAT, as it offers a better basis of comparison for assessing quantization performance (see next section).
However, if you’d like to use PTQ, here’s the code you’ll need:
import tensorflow as tf

converter = tf.lite.TFLiteConverter.from_saved_model(saved_model_dir)
converter.optimizations = [tf.lite.Optimize.DEFAULT]
tflite_quant_model = converter.convert()
Note: saved_model_dir is the path to the folder where your model is stored.
Here, we use the TFLiteConverter module to convert the TensorFlow model to TensorFlow Lite format. Then converter.optimizations = [tf.lite.Optimize.DEFAULT] is used to quantize our model.
That’s how to transform a basic model into a quantized model in just 4 lines of code.
Now let’s move on to the core tutorial of this article: Quantization Aware Training.
Training a Model from Scratch with Quantization – QAT
Here, I’m going to show you how to quantize a model from scratch.
To do this, we’re going to train a Deep Learning model on data using QAT. Then we’ll quantify it and compare its performance to the base model.
First, we load some data (for this example I’m using the MNIST dataset) and define the structure of our model:
import tensorflow as tf

# Load MNIST dataset
mnist = tf.keras.datasets.mnist
(train_images, train_labels), (test_images, test_labels) = mnist.load_data()

# Normalize the input image so that each pixel value is between 0 to 1.
train_images = train_images / 255.0
test_images = test_images / 255.0

# Define the model architecture.
model = tf.keras.Sequential([
  tf.keras.layers.InputLayer(input_shape=(28, 28)),
  tf.keras.layers.Reshape(target_shape=(28, 28, 1)),
  tf.keras.layers.Conv2D(filters=12, kernel_size=(3, 3), activation='relu'),
  tf.keras.layers.MaxPooling2D(pool_size=(2, 2)),
  tf.keras.layers.Flatten(),
  tf.keras.layers.Dense(10)
])
Next, we can install the tensorflow-model-optimization library, which will enable us to quantify our model:
pip install -q tensorflow-model-optimization
Note: if you want to use this command directly in a Python notebook, simply add a ! at the beginning of the line.
Next, we can make our model quantization aware with tfmot.quantization.keras.quantize_model:
By the way, if your goal is to master Deep Learning - I've prepared the Action plan to Master Neural networks. for you.
7 days of free advice from an Artificial Intelligence engineer to learn how to master neural networks from scratch:
- Plan your training
- Structure your projects
- Develop your Artificial Intelligence algorithms
I have based this program on scientific facts, on approaches proven by researchers, but also on my own techniques, which I have devised as I have gained experience in the field of Deep Learning.
To access it, click here :
Now we can get back to what I was talking about earlier.
import tensorflow_model_optimization as tfmot

quantize_model = tfmot.quantization.keras.quantize_model

q_aware_model = quantize_model(model)
Now we have two models: model and q_aware_model.
I suggest we train them and compare their performance.
Let’s start with the model (non-quantized):
model.compile(optimizer='adam',
              loss=tf.keras.losses.SparseCategoricalCrossentropy(from_logits=True),
              metrics=['accuracy']
              )

model.fit(
  train_images,
  train_labels,
  epochs=10,
  validation_split=0.1,
)Output:...
Epoch 10/10
1688/1688 [===] - 17s 10ms/step - loss: 0.0335 - accuracy: 0.9900 - val_loss: 0.0560 - val_accuracy: 0.9862
Then we can move on to the q_aware_model:
q_aware_model.compile(optimizer='adam',
                      loss=tf.keras.losses.SparseCategoricalCrossentropy(from_logits=True),
                      metrics=['accuracy']
                      )

q_aware_model.fit(
  train_images,
  train_labels,
  epochs=10,
  validation_split=0.1,
)Output:...
Epoch 10/10
1688/1688 [===] - 20s 12ms/step - loss: 0.0350 - accuracy: 0.9894 - val_loss: 0.0575 - val_accuracy: 0.9855
Note: a quantization aware model can be used in the same way as a non-quantized model.
Now that our two models are trained, we can compare their performance:
_, baseline_model_accuracy = model.evaluate(
    test_images, test_labels, verbose=0)

_, q_aware_model_accuracy = q_aware_model.evaluate(
   test_images, test_labels, verbose=0)

print('Baseline test accuracy:', baseline_model_accuracy)
print('Quant test accuracy:', q_aware_model_accuracy)Output:Baseline test accuracy: 0.9821000099182129
Quant test accuracy: 0.9833999872207642
Here, the quantization aware model achieves better accuracy than the base model.
This won’t always be the case.
As seen above, the quantization aware model is expected to have a lower accuracy than the base model. However, since the two models undergo a different training process, a higher accuracy can be achieved with the quantization aware model.
Nevertheless, most of the time, the quantization aware model will achieve a lower accuracy.
Quantization
Finally, we can quantify the model.
To do this, simply convert it to TensorFLow Lite format using the TFLiteConverter module. Then specify converter.optimizations = [tf.lite.Optimize.DEFAULT].
In the following code, both models are converted to TensorFLow Lite format. One will be non-quantized, the other will be quantized:
# Create float TFLite model.
float_converter = tf.lite.TFLiteConverter.from_keras_model(model)
float_tflite_model = float_converter.convert()

# Create quant TFLite model.
converter = tf.lite.TFLiteConverter.from_keras_model(q_aware_model)
converter.optimizations = [tf.lite.Optimize.DEFAULT]
quantized_tflite_model = converter.convert()
Note: here I’m using default quantization, but you can experiment with other approaches by reading the TensorFlow documentation.
Size performance
To compare the two models, we can save them in .tflite format and display their size:
import os
# Measure sizes of models.
with open('model.tflite', 'wb') as f:
f.write(float_tflite_model)
with open('quant_model.tflite', 'wb') as f:
f.write(quantized_tflite_model)
model_size = os.path.getsize('model.tflite') / float(2**20)
quant_model_size = os.path.getsize('quant_model.tflite') / float(2**20)
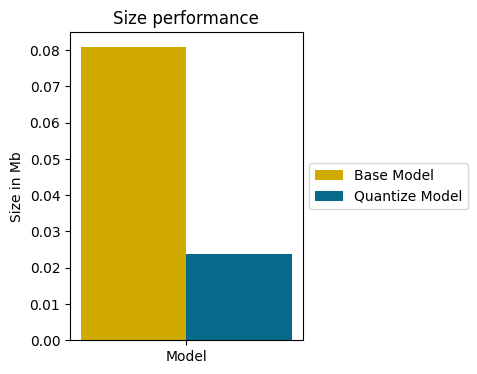
print("Float model in Mb:", model_size)
print("Quantized model in Mb:", quant_model_size)Output:Float model in Mb: 0.08089065551757812
Quantized model in Mb: 0.0238037109375
Quantization has reduced the size of the model by a factor of 4!
This achievement is even more striking when displayed on a graph:
The model is now quantified.
But questions remain: after quantization, what is the model’s performance? Has it been drastically reduced?
Let’s find out.
Accuracy performance
In this code, I create a function to evaluate a TensorFlow Lite model (the process is different from that of a classic TensorFlow model):
import numpy as np
import time

def evaluate_tflite_model(model, test_data):
  interpreter = tf.lite.Interpreter(model_content=model)
  interpreter.allocate_tensors()

  prediction_digits = []

  start = time.time()

  for i, sample_test_data in enumerate(test_data):
    output = interpreter.get_output_details()[0]  # Model has single output.
    input = interpreter.get_input_details()[0]  # Model has single input.
    input_data = tf.constant(1., shape=[1, 1])
    interpreter.set_tensor(input['index'], np.expand_dims(sample_test_data, axis=0).astype(np.float32))
    interpreter.invoke()
    output = interpreter.get_tensor(output['index'])
    digit = np.argmax(output[0])
    prediction_digits.append(digit)

  prediction_digits = np.array(prediction_digits)
  accuracy = (prediction_digits == test_labels).mean()

  inference_time = time.time() - start

  return inference_time, accuracy
We can then use the function with the quantized model and compare the result with that of the quantization aware model:
res_quant_model = evaluate_tflite_model(quantized_tflite_model, test_images)

print('Quant Aware TF test accuracy:', q_aware_model_accuracy)
print('Quant TFLite test accuracy:', res_quant_model[1])
Output:
Quant Aware TF test accuracy: 0.9833999872207642
Quant TFLite test accuracy: 0.9832
We can see that the quantized model underwent a slight degradation in performance after quantization. Nevertheless, this loss is most likely negligible.
Speed performance
Now we can compare the speed performance of the base model with that of the quantized model.
Here, I separate the test dataset into 5 equal parts and evaluate both models:
test_batches = np.array_split(test_images, 5)

model_infs_time = []
quant_model_infs_time = []
infs_nbr = []
i = 0

for test_batch in test_batches:
  i += 1
  model_inf_time, _ = evaluate_tflite_model(float_tflite_model, test_images)
  quant_model_inf_time, _ = evaluate_tflite_model(quantized_tflite_model, test_images)

  model_infs_time.append(model_inf_time)
  quant_model_infs_time.append(quant_model_inf_time)
  infs_nbr.append('Inference_'+str(i))
Next, we can display the inference time of the two models to determine which is faster:
import matplotlib.pyplot as plt
import numpy as np

left = np.arange(len(model_infs_time))
width = 0.3

fig = plt.figure(figsize=(6, 4))
fig.patch.set_alpha(1)

plt.bar(left, model_infs_time, color='#d1aa00', width=width, label="Base Model", align="center")
plt.bar(left + [width], quant_model_infs_time, color='#066b8b', width=width, label="Quantize Model", align="center")

plt.xticks(left + width / 2, infs_nbr)
plt.legend(loc='center left', bbox_to_anchor=(1, 0.5))
plt.ylabel("Inference time in s")
plt.title("Inference performance")
plt.show()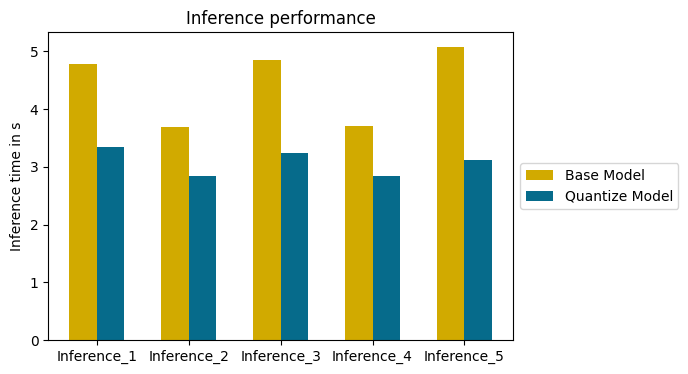
Note: quantization can improve the inference speed of Deep Learning models, but there are also techniques for improving the training speed of traditional Machine Learning models. If you’d like to read my article on the subject, click here.
The quantized model is faster than the basic model on all inferences.
The average time saved on this example is 1.34 seconds. A valuable time saving for many Deep Learning projects.
Quantization makes it possible to reduce the size of a Deep Learning model.
While imposing a (negligible) reduction in performance, this technique greatly improves execution time.
Optimizing a Deep Learning model is an important step in any project. In addition to quantization, it’s important that your model is structured correctly to achieve good performance.
If you want to deepen your knowledge in the field, you can access my Action plan to Master Neural networks.
A program of 7 free courses that I’ve prepared to guide you on your journey to master Deep Learning.
If you’re interested, click here:
One last word, if you want to go further and learn about Deep Learning - I've prepared for you the Action plan to Master Neural networks. for you.
7 days of free advice from an Artificial Intelligence engineer to learn how to master neural networks from scratch:
- Plan your training
- Structure your projects
- Develop your Artificial Intelligence algorithms
I have based this program on scientific facts, on approaches proven by researchers, but also on my own techniques, which I have devised as I have gained experience in the field of Deep Learning.
To access it, click here :